Showing posts with label LHBW Unit 1 week 1. Show all posts

7/30/2011

Big Woods Day 4

Learning how we breath was interesting and fun!  The girls made model of human
lungs with a plastic bottle, balloons, tape, straws and a walmart bag.

What a wonderful week we had learning
how awesome and creative our
Heavenly Father is...
HalleluYah!! 

Big woods Day 3

Have you ever wondered what an owl pellet is?  My girls did.  When
I brought home a couple of skeleton pellets (which is different from an actual
owl pellet, which I found out latter) at Hobby Lobby my girls started the
guessing game... an egg... scat... fossil... and a dead prey, pretty close
guess but not on the money.  Today my girls found out what they were and
what can be found in them.  They learned that owl pellets are the
non-digestible parts of the owl meals, such as feathers,
fur, bones and insect shell.  And they regurgitate it,
lovely huh!  Before we dissected our pellets were watched a few videos.

A baby owl regurgitating a pellet

What is a barn owl pellet

OK, so I found out that Skeleton Pellets are not Owl Pellets.  What I purchased was
and I quote:
One Sanitary Synthetic Owl Pellet...
The "Skeleton Pellet" included in this bag contains and entire Starling skeleton!  
The Starling, or Stumis vulgaris, is a common menu item in the barn owl's diet.  
The starling skeleton reveals special structural adaptation which enable flight.  
Their design has been molded by nature to provide support 
with a minimum amount of weight.

It was a bit disappointing that we didn't have an 'authentic' pellet
but, as soon as the girls saw the bones the disappointment 
flew out the window and the awe of Yah's creation
took over.  Here are a few pics of what they found.


The included a pellet, small magnify glass,
and instructions with a picture of 
a Starling Skeleton.


This is the pellet, it's made up of sanitized fibers.
A real pellet would have feathers, fur and possible
bug wings as the encasing of the bones.


as they opened their pellets they found
bones and feather, at this point
the shrills of excitement could be heard


Mama, I think I found a...


ewwww... it's a bird skull....


they found pelvic bone, wing bones, even the
legs with claws and...


rib bones, lots of rib bones!

Now the girls want to assemble the skeleton!
Just to get an idea of what
they want to do here is a pic I found
pic of a full assembled Starling here

If they get it assembled I'll update with a pick.


We had started an art project last night using
Borax Laundry Booster, pipe cleaner, string, and  boiling water.


we cut the 12" pipe cleaner into thirds...  an opportunity for
a math lesson.  Twist all three pipe cleaners
together in the center to form a 6 pointed star.
Tie string around each pipe cleaner


and fully immerse into the diluted
borax and boiled water solution


wait 12-24 hours...


this is the lovely result... a beautiful
crystal snowflake in the middle of Summer!


You can find the snowflake project here
it also give you the 'science behind the fun'!

Big Woods Day 2

Today we learned about Density.  Density is how closely
packed materials of an object are.
Here is a video we found to help the girls understand it better.

And here is a great experiment to go with the lesson.  Of coarse we found
this experiment AFTER they did their own using hot sauce, oil, and
balsamic vinegar


I love this experiment, very colorful presentation


here is one using different liquids and eggs... very cool


The girls choices for the experiment:
Hot Sauce, Cooking Oil, and Red Wine Vinegar
The girls thought that the oil would be the only one
that had less density than water and the other two
choices would have the heavier density.
Lets see if they were right.


This was the Hot Sauce, the pic was taken a few minutes after
the initial pouring so there was a bit of sinking, but at first there
was none.  The girls figured that the less dense ingredients must
have been emulsified with the heavier dense ingredience and
in the short amount of time there was a separation.


There guess about the oil was on target, they added
red food coloring in hopes to see a better difference.


And their guess on the vinegar was correct, vinegar
was a denser liquid than water


We also learned that butter is less dense than water, so why not
make our own butter and find out.  This is an easy and fun experiment. Churning
cream into butter.  All we needed was heavy whipping cream and two jars with lids.
and two girls that have strong arms!


There they were shaking, shaking and shaking. There was a point
that the cream turned to whipped cream and the girls
had to pour the wc into larger jars.  And began
shaking again.


And there it is BUTTER!  They were so excited about 
making butter that they forgot the density experiment.
Instead their minds started turning and remembered the story
Daddy told them, when he was a young boy his Mama would churn
butter and save the butter milk for him.  He would smear the fresh 
butter on some homemade cornbread and pour the fresh 
cold butter milk on top of the cornbread.  So, as a surprise for Daddy
they cooked up some corn bread, poured the butter milk (the left 
over liquid from the butter) in a glass and
put it in the refrigerator, till Daddy came home.
What a pleasant surprise his girls gave him...


Yummy, just like when he way a boy!


We took some of the butter and put it in a candy
mold to make pretty flower butter pats just like Laura Ingalls
Mother did in the book, Little House in the Big Woods.


What an Fun Filled  Day it was!!

7/25/2011

Big Woods Day 1

This is our first day of our first week in Prairie Primer.  However, before I post what we have done today,  I want to share a project we started last week in preparation for a knitting project in week two of the Primer.
Since my girls already know how to knit I thought if would be fun for them to learn how to spin.  About a month ago a fellow blogger Danni, from On the way to Critter Farm, was offering llama fleece to anyone who would be interested, you can read about it here.  When we received it in the mail we were thrill with the amount she gave us!  (THANK YOU DANNI hugs and kisses from the girls)  I didn't weigh it but I think just eying it we may get a ball on yarn from it.

OK, I'm gonna put the prep process on hold to get to last weeks project, while searching out what we needed to spin this fiber with, I thought it a good idea to joined a yahoo group for spinners and just so happens ;-)  a member was posting about a 'kick spindle', so I googled it.  And found this, I know, beautiful!  I'm sure it is worth all of the $75.00 they are asking but our pocket book just could not handle it, so as I studied the spindle, I thought we could do this!.  We went out a bought the materials for a mere $30 for both spindles and had material left over to make another... possibly for mama ;-)  Yes, the girls build their own kick spindles, not as fancy but functional.  Here are a few pics of the process, enjoy!


First, remove the stud from the bun foot


yay, got it!

drilling a center whole in the bun foot


cutting the dowel rod down to size


sharpening each end of the cut dowel rod


screwing in the hook at the end of the small rod


didn't get a pick of cutting down the larger dowel rod
but did get the pic of the 45 degree angle of the cut


drilling a hole in the larger rod for the small dowel rod to go through


gluing down the larger dowel to the base


Here is their kick spindles and yes that is
some of the llama fiber, it was still dirty but
we just had to try out the spindles and they
work beautifully!!


Now, please understand that this llama fiber came straight off Kai, with
all the vm (vegetation matter), mud (not much) and 
what we think was a nice smell of llama!
Needless to say we couldn't spin it in this condition, so back to
google for some help and help I received.
We learned that the process of prepping the fiber was
SIMPLE!
Of coarse with the simplicity there was some very
important steps to follow in assuring that the fiber
would not felt in the process.


Here is the raw fleece with a sweet note from Danni


And here is the Lovely Kai, such a beauty!!


AbbiYah picking out vm and mud


YahChanna meticulously picking out vm


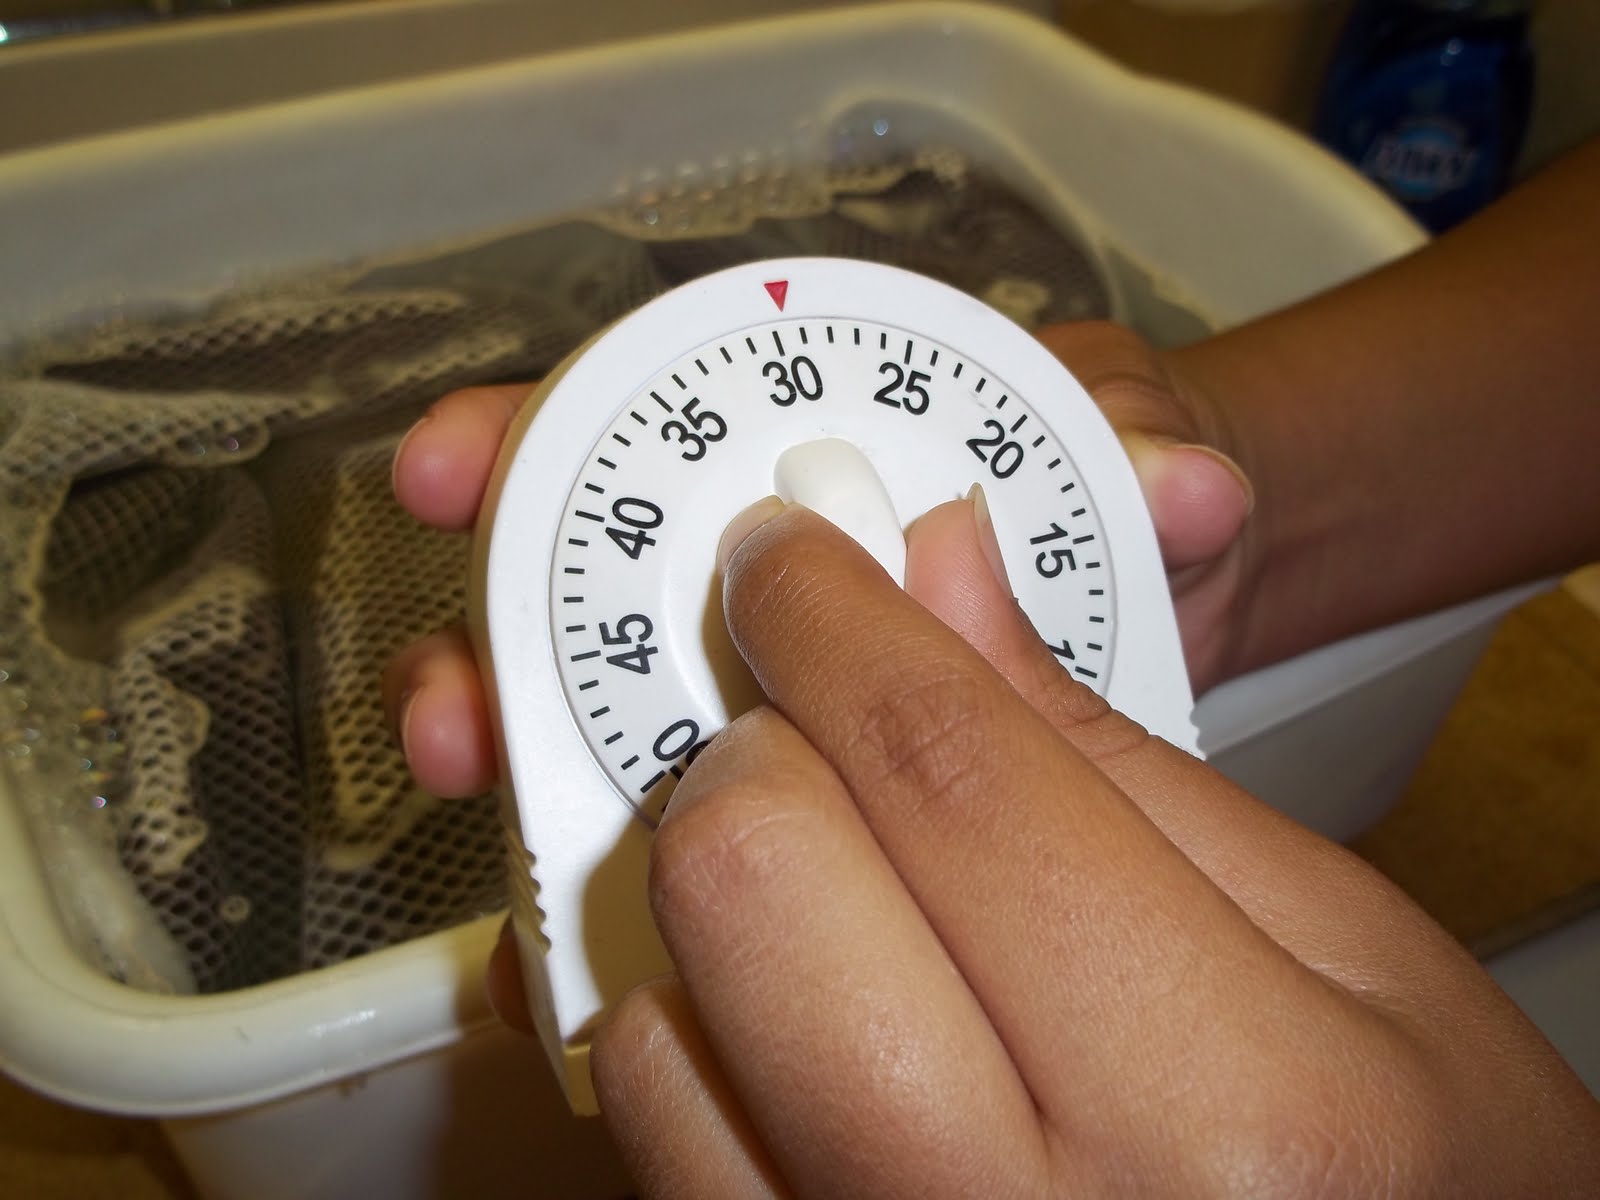
OK, the reason for taking the temp is we wanted to know
how hot the water was when we started.


a tablespoon of liquid Dawn Soap


Immerse/soak the fleece, it is important not to agitate or
move the fleece around too much, it can felt.  So, press it down
for about 30 seconds, release and let it alone!


Set the timer for 30 min.


When the 30 minutes are up, take the temp of the water, this is an
important step, because fluctuation of water temps can,
yes you guessed it, felt the fiber.


ever so gently squeeze just once maybe twice the excess water
out of the fiber, why gently... don't want to felt the fiber


Kai's fleece didn't look that dirty to us
but the water says other wise.  I found out while 
searching out about Llama's they love to roll in the dirt!


OK, to rinse the fiber they filled the tub with the same temp water no soap this
time and immersed the fiber again, just hold under for about 30 seconds and let it alone


after 30 min, gently squeeze the excess water out


Well, the water isn't very clear so they rinsed again 
since I posted the pics of the first rinse I didn't
see the need to repeat, so no pics of the second rinse


We gently placed the wet fiber onto a thick dry towel, rolled it
up and walked on it.  We did this twice with a fresh dry towel
because we didn't have any framed screen to dry it outside
in, it worked for us.  The result dry fiber!


After the fiber dried, it needs to be picked out, to loosen it up and
free the fibers of any mats.  While doing this process we removed
the vm we missed the first round.
The above pic is Kai's clean ready to be
carded fiber.  Oh carding?  That's for
another day ;-)